GroveStreams iMonnit Webhook - Quick Start
This tutorial will walk through the creation of a GroveStreams user account, an organization, and the configuration of a iMonnit Webhook. The iMonnit Webhook will push data from the iMonnit cloud into your GroveStreams organization as data arrives.
Monnit specializes in monitoring and controlling machines and other "things". Monnit products include wireless gateways and sensors and a website, iMonnit, to configure and manage those sensors.
Step 1: Create a Free GroveStreams User Account and Organization
Open a browser and navigate to the GroveStreams registration page and sign up: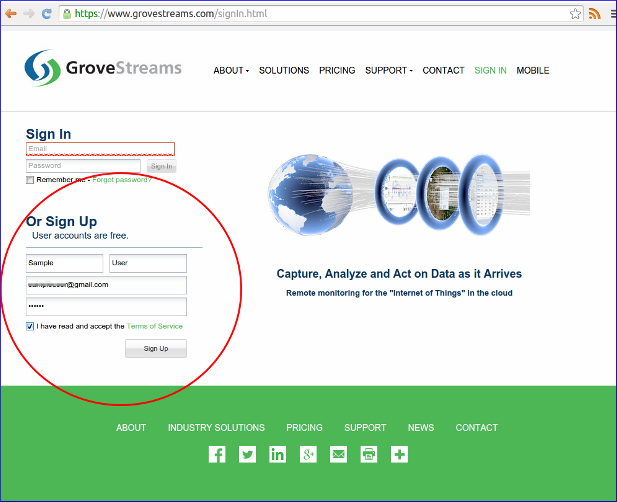
Log into GroveStreams after creating your free user account.
You will be prompted to create an organization. Select Yes:
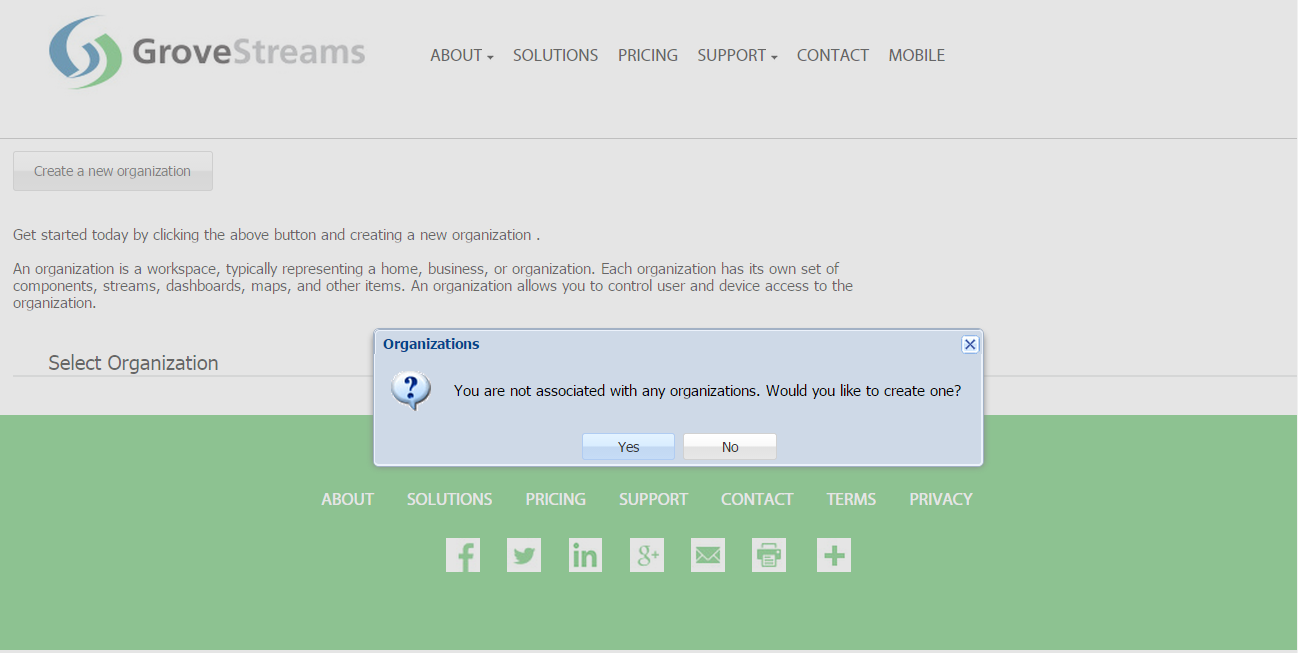
What's an Organization?
An organization is a Workspace, typically representing a home, business, or organization. Each organization has its own set of components, streams, dashboards, maps, and other items. An organization allows you to control user and device access to the organization. You are automatically the "owner" and given full access rights when you create an organization. Other users may invite you to their organizations with rights they give you. All of the organizations, you "own" or are a member of, will appear in your GroveStreams start page (the first page that appears when you sign in).
An organization is a Workspace, typically representing a home, business, or organization. Each organization has its own set of components, streams, dashboards, maps, and other items. An organization allows you to control user and device access to the organization. You are automatically the "owner" and given full access rights when you create an organization. Other users may invite you to their organizations with rights they give you. All of the organizations, you "own" or are a member of, will appear in your GroveStreams start page (the first page that appears when you sign in).
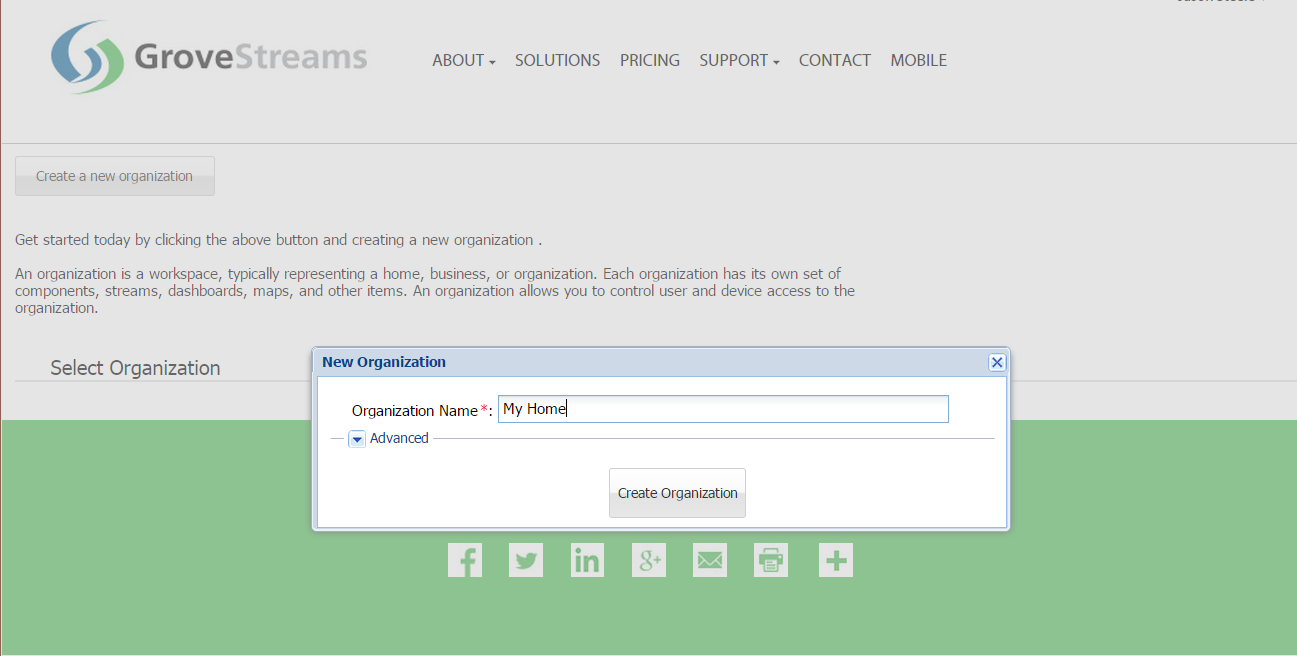
Enter a name for the new organization. It can be any name. Click Create Organization:
Enter your new organization by clicking on its name:
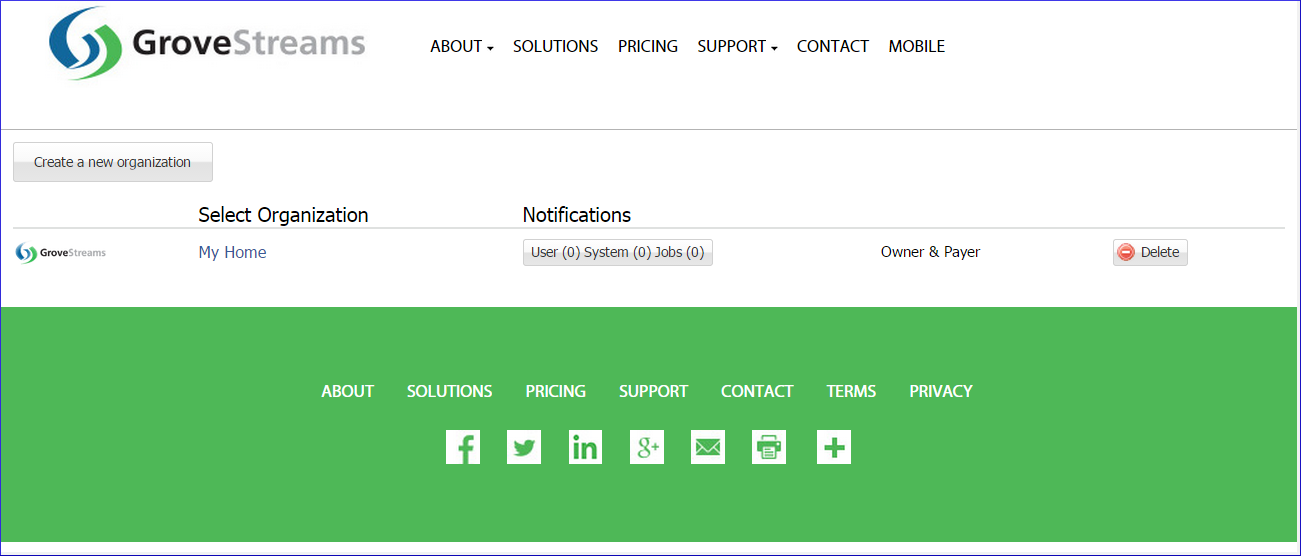
The API Key can now be retrieved. The API Key is needed later in the tutorial:
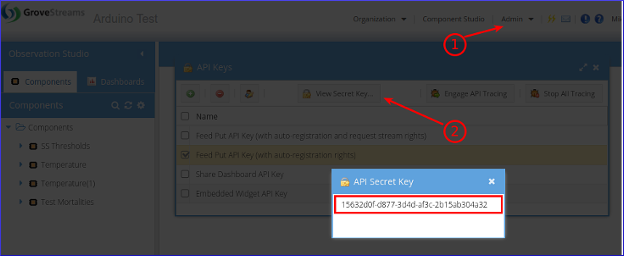
To find your Secret API Key:
1. Select the Admin - API Keys menu option and choose the Feed Put API Key (with auto-registration rights) key
2. Click View Secret Key
3. Select and copy the API Secret Key to the clipboard (Ctrl-c) when you are ready to paste it below.
Step 2: Create the iMonnit Webhook
Navigate to Monnit's webhook page: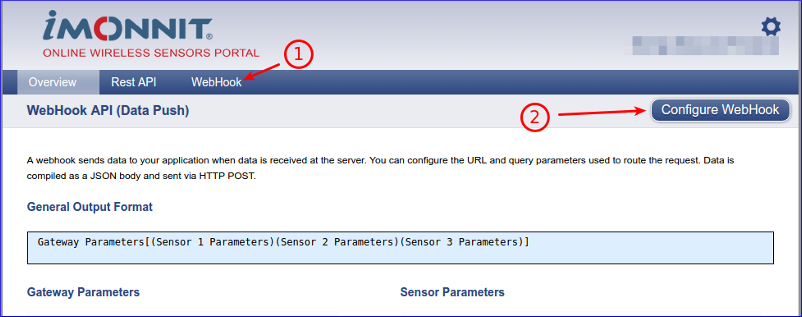
1. Select the WebHook tab
2. Click the Configure WebHook button
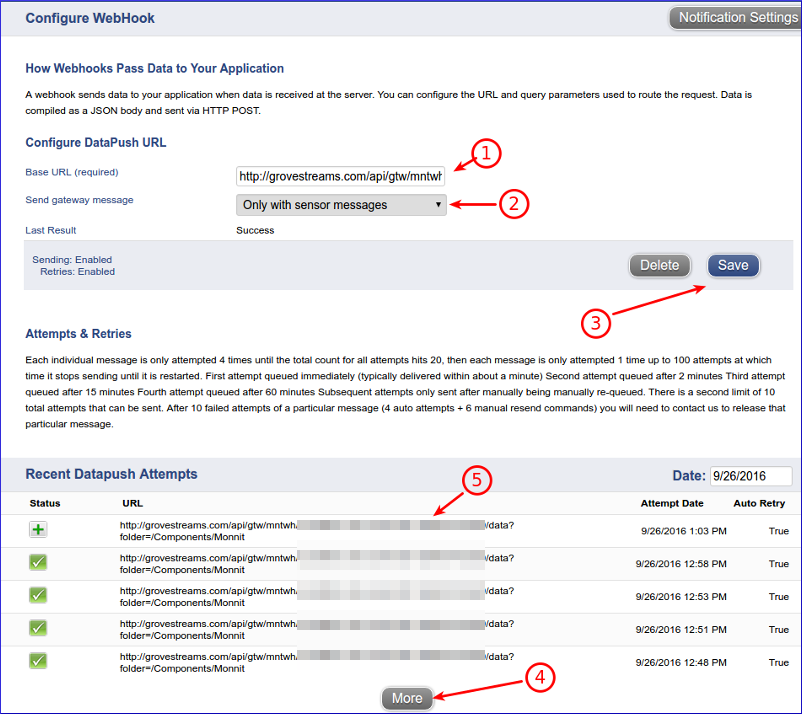
1. Base URL (required): Enter the URL for the GroveStream iMonnit gateway. URL format: http://grovestreams.com/api/gtw/mntwh/{api_key}/data
Replace {api_key} with the api key copied above. Example URL:
There are several optional URL parameters that can be added to the URL:
- folder: Optional. Include a folder location for all new components to be created into.
- tz: Optional. Include a time zone id for all new components. The GroveStreams organization owner's time zone will be used if no time zone is included on the URL.
- gtwTmplId: Optional. A component template ID for all gateway components. All gateway components will be created based on the template ID passed in.
- senTmpl{applicationId}: Optional. A component template ID for sensor components that match the iMonnit application ID appended to the end of senTmpl. Sensor components will be created based on the template ID passed in.
- Example: http://grovestreams.com/api/gtw/mntwh/4a97b638-9c98-33a8-89c9-6b00e3026899/data?gtwTmplId=mntGtw&senTmpl2=mntTemp&senTmpl8=mntLight&senTmpl95=mntVibration&folder=/Components/New+Components&tz=US/Central
2. Send gateway message: Select how often gateway information should be sent to GroveStreams. We recommend "Only with sensor messages" to reduce I/O
3. Click the Save button
4. Click the More button after one or more sensor samples have been uploaded to iMonnit
5. Click on a transaction to see what information was passed to GroveStreams and whether the call was successful
Our iMonnit gateway logic queues up PUTs and blasts them into GroveStreams every 10 seconds so it will take a few seconds for the sample to arrive in GroveStreams. We do this to respect the GroveStreams 10 second upload limit per source IP. The source IP is an iMonnit Cloud Server.
Your component will land under the Components folder in Observation Studio. Refresh that folder to see if it has registered.
Congratulations! You have successfully created an iMonnit Webhook that pushes measurements into GroveStreams.
Click on the Dashboards tab to create dashboards and maps. Right click on the component and choose Edit Component to set your component's location, add stream units, create events with notifications, and change other properties. Keep exploring and learning!
Continue with the GroveStreams Temperature Example to learn more about how to make the most of your data with GroveStreams.
How it Works
The iMonnit Cloud pushes data to GroveStreams as it arrives.The data sent to GroveStreams arrives to our webservers in iMonnit's cloud JSON format. The JSON includes the sample data, sample time, and several keys so that GroveStreams knows where to store the data being sent:
- api_key: This is included as part of the URL above and is your secret API key. It tells GroveStreams which organization the data will be inserted into and ensures the caller has the proper rights to make the call
- gatewayID: This is the Monnit gateway ID. A corresponding GroveStreams component with the same ID will be created if it does not exist. GroveStreams
- sensorID: This is the Monnit sensor ID. A corresponding GroveStreams component stream with the same ID will be created if one does not exist
- date and messageDate: The sample time
This example was made simple by allowing GroveStreams to create a default component with default streams. GroveStreams will do its best to determine if the stream type is a number, text, or boolean based on the first sample arriving. Users can view or modify existing component definitions by right clicking on them and selecting Edit Component. Modify any component attributes except the component and stream IDs. Consider using component templates to avoid having to edit every component after it registers.
Troubleshooting
Successful API calls to GroveStreams should return a status of: HTTP/1.1 200 OK.Ensure the iMonnit webhook is pushing data to GrovevStreams by clicking the More button on the iMonnit webhook page. Click a transaction on the same page to determine if the transaction was successful or not.
If the call made it to a GroveStreams server, but an error still occurred, a GroveStreams system notification will be created that contains the error. While in the GroveStreams organization's Observation Studio, click on the Notifications button located in the top toolbar (It looks like an envelope) and select the System tab. Click Refresh to list new notifications.
Any parameter that is part of the URL within the Command needs to be URL encoded. This should only become an issue if you have given any parameters a value with reserved URL characters (such as spaces or commas). There are many free URL encoders on-line that you can use to encode your URL or URL parameters such as freeformatter.com.
Ensure you are not using the same API Secret Key for different organizations. API Secret Keys are only associated with the organization they have been created within and can only be used for that organization.
Having problems or you wish to modify the solution and are not sure what to do?
Post a question on our forum or send us an email and we'll do our best to help you out: support@grovestreams.comHelpful Links
GroveStreams Temperature ExampleGroveStreams Help Center
GroveStreams Simple Feed PUT API
GroveStreams Forum
iMonnit Webhook Configuration
iMonnit Webhook API (Data Push)

