GroveStreams STMicroelectronics STM32F746 Discovery - Advanced
This tutorial walks through the programming of the STMicroelectronics STM32F746 Discovery board.Sample code for this tutorial can be found here: https://developer.mbed.org/teams/GroveStreams/code/GroveStreams-Temp
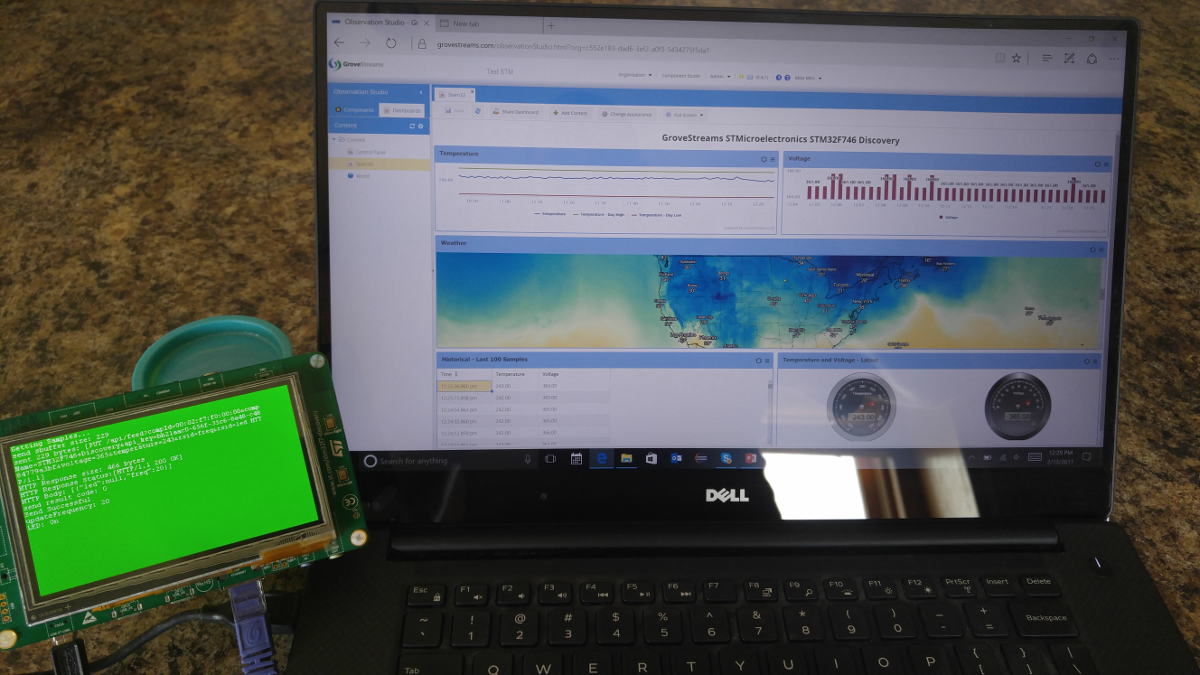

The tutorial demonstrates:
- Uploading temperature and voltage readings into GroveStreams
- An accurate polling technique
- Verbose debugging displayed on the LCD display
- Re-establishing dropped Ethernet connections
- Sending commands and configuration settings to the device from a GroveStreams dashboard through a local firewall:
-
The command is an LED on/off command and the configuration setting is the sample frequency.
Two GroveStreams data
streams will be leveraged:
1. An LED stream
2. A Sample Frequency stream
-
The command is an LED on/off command and the configuration setting is the sample frequency.
Two GroveStreams data
streams will be leveraged:
- Has a GroveStreams user account and an Organization
- Has an ARM mbed user account and is knowledgeable with the ARM mbed Free Online IDE
Step 1: Program the STM32F746
The mbed online compiler allows projects to be published for anyone to use. We've published this example. It can be inserted into your IDE. Open the ARM mbed Free Online IDE:1. Right click on Projects and select Import Program - From URL
2. Source URL: https://developer.mbed.org/teams/GroveStreams/code/GroveStreams-Temp/
3. Enable Update
4. Click Import
Your Project should look like this:
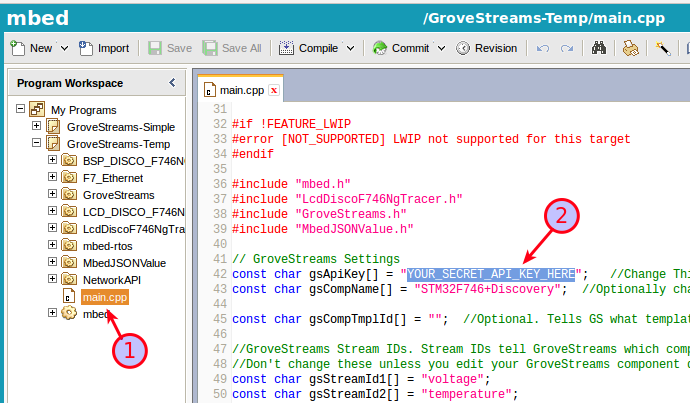
1. Double click main.cpp
2. Set the gsApiKey variable in your sketch to match your GroveStreams organization Secret API Key. You can use the same key that from the GroveStreams STMicroelectronics - Quick Start tutorial.
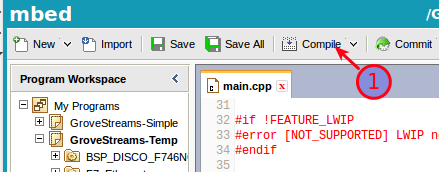
1. Click Compile and save the image to the board
Your data will arrive within 20 seconds as a data stream under a newly created component in Observation Studio
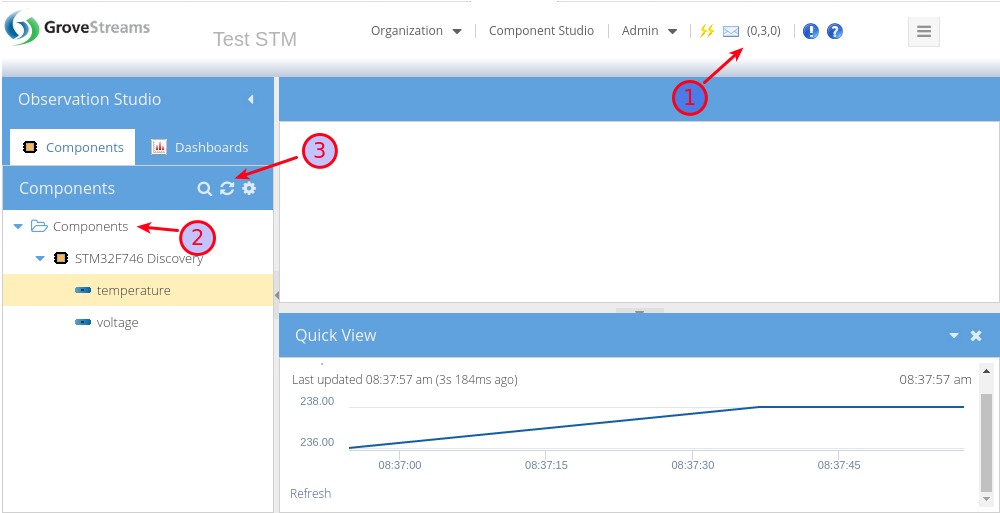
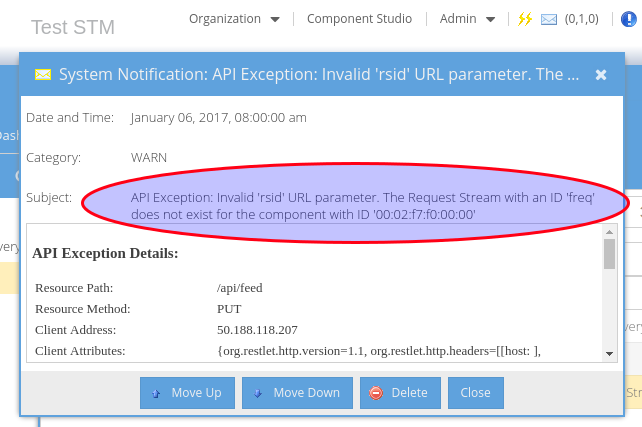
1. The notification button will indicate if you have any notifications. Some notifications report errors. Check for any notifications that may contain any upload errors. There should be one Warning notification. That issue will be addressed in the next section.
2. Select the Components folder.
3. Click the Refresh button.
Your new component will appear under the Components folder.
Step 2: Add Command Streams to the Component
This section explains how to manually add two command streams to the component. Command streams are streams, just like other streams. They can be Regular, Interval, or Point streams. The device will poll for the latest value from these streams. A dashboard in Step 3 will be created that allows values to be easily appended to the end of streams so that they can be picked up from the device.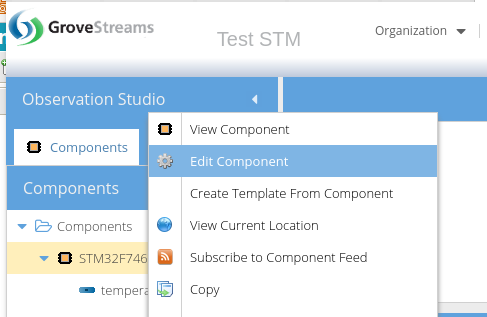
Right-click on the component and select Edit Component
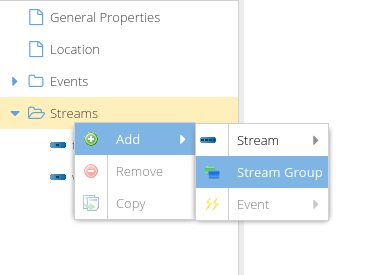
Within the component editor, select the Streams folder, right-click, and select Add - Stream Group
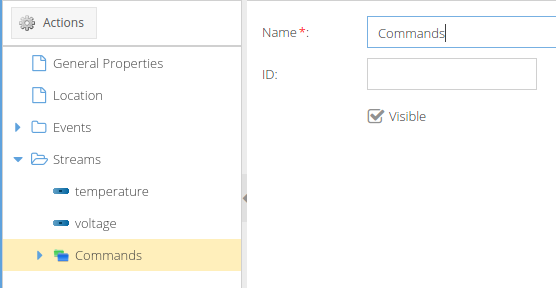
Name the new Group Commands. A Group is used to organize similar streams under a component.

Select the Commands group, right-click, and add a Point Stream
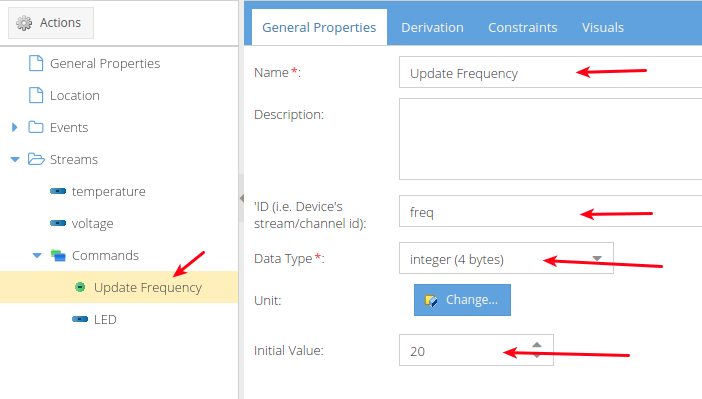
Select the new Point stream and enter the settings above.
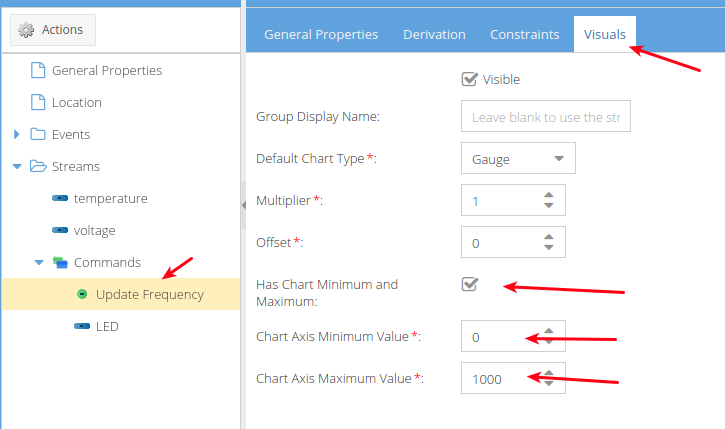
Select the Visuals tab for the new Point stream and enter the settings above.

Select the Commands folder, right-click, and create a new Regular stream.
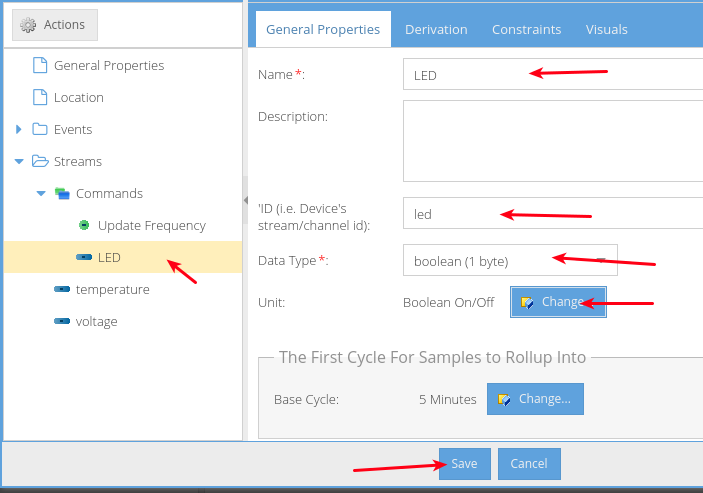
Select the new Regular stream and enter the settings above. Click the Save button to save the changes to the component.
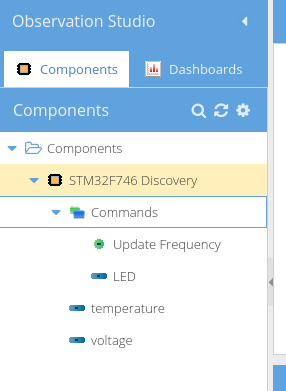
The new component should look like the above.
Step 3: Create the Command Dashboard
This section explains how to create a dashboard that allows the board's sample frequency and the LED state to be changed from a GroveStreams dashboard.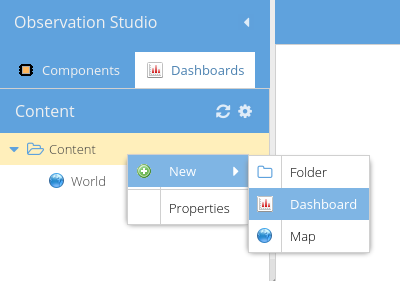
Select the Dashboards tab, right-click on the Content folder and select New - Dashboard
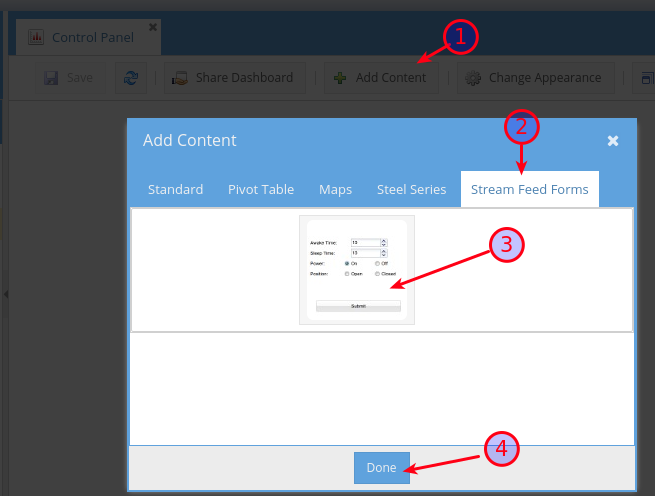
1. Double-click the new dashboard to open it and click Add Content
2. Select the Stream Feed Forms tab
3. Click the form icon once to add one form widget to the dashboard
4. Click Done
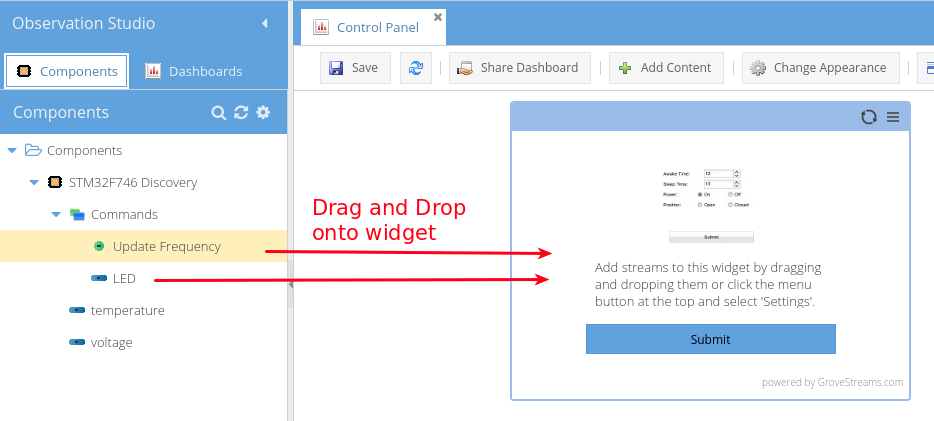
Drag and drop both command streams onto the new form widget.
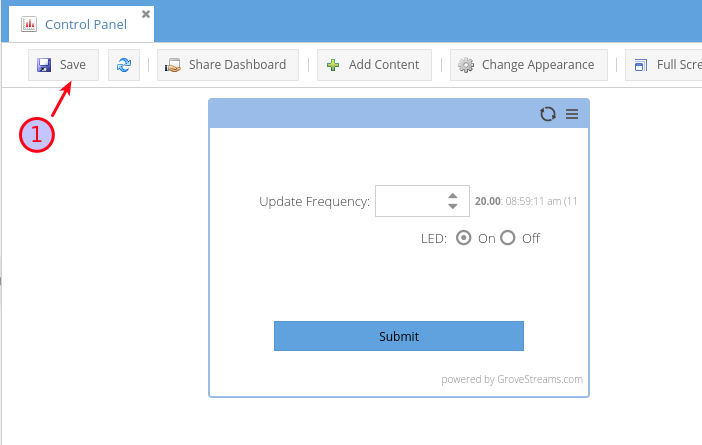
Click Save to save your new dashboard
Apply commands:
1. Select On for LED
2. Enter 15 for Sample Frequency
3. Click Submit
Wait a few seconds (up to 20 seconds)...
The board's LED light will be on and samples will now be uploaded every 15 seconds.
Congratulations! You have successfully pushed data from a STMicroelectronics board into GroveStreams and you have created a command dashboard.
How it works
- A component with streams was created with default settings when the first call from the board arrived.
- The component has two manually added command streams: LED and Sample Frequency. These streams will hold command and setting values that are used by the device. We chose a Regular stream type for the LED Light stream so that a historical record of commands is tracked. We chose a Point stream type for the Sample Frequency because we only want to store the last value.
- The Stream Feed Form on the dashboard will set both values when the Submit button is clicked.
- The URL used to upload the temperature and voltage readings within the board's code includes two rsid parameters. rsid stands for Request Stream ID. The last_value of each stream, within the component the data is uploading into, will be returned.
- The board's code checks the return HTTP body after each call for a JSON string that contains stream last_value amounts.
- The values are extracted from the JSON string using a JSON parser.
- The LED and Sample Frequency values are then applied to the device.
The technique to bring back commands and setting values after each data upload, is not a real-time control framework, but it is very simple, keeps a record of commands & settings, reduces the number of transactions required, and will work through a local firewall without having to configure the firewall.
Tips
- Utilize Component Templates to avoid hand editing similar components as each registers.
- Right-click on your component and edit it. Set its location. Add events to streams.
- Continue Exploring and Learning GroveStreams!
Troubleshooting
Successful API calls to GroveStreams should return a status of: HTTP/1.1 200 OK.If the call made it to a GroveStreams server, but an error still occurred, a GroveStreams system notification will be created that contains the error. While in the GroveStreams organization's Observation Studio, click on the Notifications button located in the top toolbar (It looks like an envelope) and select the System tab. Click Refresh to list new notifications.
Ensure you are not using the same API Secret Key for different organizations. API Secret Keys are only associated with the organization they have been created within and can only be used for that organization.
Having problems or you wish to modify the solution and are not sure what to do?
Post a question on our forum or send us an email and we'll do our best to help you out: support@grovestreams.comHelpful Links
GroveStreams Temperature ExampleGroveStreams Help Center
GroveStreams Simple Feed PUT API
GroveStreams Forum
ARM mbed Free Online IDE
ARM mbed DISCO-F746NG
